Operational Telescope : Celestron Nexstar 4 SE

thumbnail
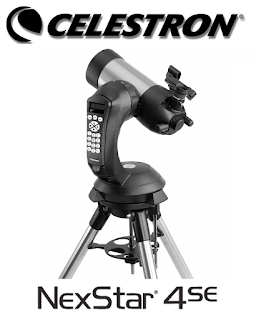
In the previous post, we have discussed about the parts and functions of Celestron Nexstar 4 SE telescope, visit this link Celestron Nexstar 4SE  .In this post, we will discuss about the operational of this telescope. here are some guides:
celestron nexstar 4se
Source : Manual Book Celestron Nexstar 4 SE
1. Assembling.
a. Set up a tripod and set the plain by using a waterpass.
b. Attach the mount and the telescope tube.
c. Attach the star pointer and calibrate it by adjusting altitude and azimuth knob, keeping the pointer pointing at the same point as the point on the telescope tube.
d. Install the energy. Energy can be obtained by installing 12v AC adapters or by using 8 AA batteries.
e. Attach the hand control

2. Positioning 
There are two positions that can be used to operate the telescope, depending on what method is used :
a. Alt-azimuth Method,
By this method, the operation of the telescope will correspond to the horizontal coordinates, the telescope will move horizontally and vertically. with this method the telescope must be arranged northward with the aid of the compass, then the telescope tube is set to the index position.
b. Equatorial Method
By this method, the operation of the telescope will correspond to the equatorial coordinate, the telescope will move to adjust the declination value and ascensio recta value of celestial body. with this method the latitude stick must be adjusted according to the observer's latitude, then the tube is set at the index position, and the position of the telescope must face to the meridian.

3. Operational 
a. Set Up the Controller 
There are some rules to set:
- Coordinates, can be input manually or through a city database
- Date
- Time, current time at the time of setting.

b. Alignment
- Sky Align, using this alignment we will be guided by the telescope. telescopes will choose the best celestial bodies to serve as alignment objects, can be stars, planets or other objects that are easy to detect.
- Auto Two-Star Align, using this alignment we will be selected 2 stars automatically to serve as alignment object.
- Two Star Alignment, we need to select manually 2 stars for the alignment object.
- One-Star Align, we need to choose one star for the alignment object.
- Solar System Align, we need to choose one object that include to solar system, that is planet or sun.
- EQ North / EQ South Alignment, this alignment is done when we choose to use equatorial method when doing step positioning. such as some alignment above, this alignment also has some kinds : EQ Auto Align, Two-Star Align EQ, One-Star Align EQ, EQ Solar System Align.

To improve calibration accuracy, choose alignment that supports a large number of sky objects (2 or more), if alignment is done but the accuracy level is bad, so alignment can be fixed with "sync" menu.

c. Tracking
After doing some arrangement as we mentioned above then telescope can be enabled to see the celestial objects automatically and follow it's movement. there are several objects that can be observed, including by using the following menu:
- LIST Menu, to search for sky objects "Named Star, Named Object, Double Stars, Variable Star"
- Catalog menu (M, CALD, NGC, STAR), to search for celestial objects through the number of objects.
- PLANET menu, to search for planetary celestial bodies.

Observation of celestial bodies can also use several methods such as:
- Tour Mode: to see interesting sky objects when observation time

- Constellation Tour: to see and observe the configuration of the stars that make up the constellations.

d. Focusing 
This stage is to be done to sharpen the image produced on the eyepiece lens, this stage is done by turning Focuser on OTA until our eyes feel comfortable to see the object, and the result object is not blur. Each observer's individual eye is different in focus settings, this is because of the possibility of eye defects in the eye's lens

e. Setup Tracking
Telescopes can follow the movement of celestial bodies, but it must be set in advance setup tracking with 2 settings:
- Tracking Mode, must adapt to the telescope mounting method. (Alt-Az, EQ North, EQ South)

- Tracking Rate, must adjust to the object being observed (Sideral, Lunar, Solar).

If yo want to compare the method of this telescope with other telescope visit this link. Opertional Telescope : Ioptron Minitower II.

When will 1 Muharram 1439 H begin?

thumbnail
The year of 1438 H. will end. Soon, we will enter the new of hijriah year 1439 H. According to calculations in the book Ittifaq Dzatil Bain, conjunction of the end of the lunar month at the end of the year will occur on Wednesday, September 20, 2017, at noon at 12:25:57 UTC + 7.

We describe the calculation of 1 Muharram 1439 H using the book of Ittifaq Dzatil Bain, with Condrodipo as the point of observation:
Calculation of 1 Muharram at Condrodipo, Gresik
The determination of the beginning of the month as well as the beginning of the year will be very interesting. why is that? because the height of crescent is low enough but slightly above the criteria of MABIMS. If calculated using the criteria M.Odeh crescent condition at Condrodipo on this month can not be seen (Not Possible).
Map of Crescent Visibility
Source : Accurate Times
Rukyatul hilal in condrodipo often results the appearance of a new moon. Though not a photographic image, but the result of the rukyatul hilal is still considered, and made as one of the basic determination of the beginning of the month in Indonesia.

Astronomers often mention that the moon with the criteria MABIMS very difficult to see, even impossible, but in reality the observers of rukyatul hilal not so. If the height of the hilal is above the criteria of MABIMS usually can be sure there is a report that Crescent is visible.

Further research is needed on this matter, which unites some opinions from various parties, astronomers, fiqh experts, and also the government.

1 muharram will occur on Thursday, 21 September 2017, it is based on MABIMS criteria, but for certainty we should follow the government's decision. Below! Simulation of rukyatul hilal 1 Muharram 1439 H in Condrodipo Gresik.

Simulation of Sunset at Condrodipo
Source : Stellarium

Simulation of Rukyatul Hilal at Condrodipo
Source : Stellarium

The Pole of Earth and The Point of Compass

thumbnail
The Poles
Pole are defined as an axis, the polar division of the earth exists a variety, including the magnetic poles of the earth and the geographical poles of the earth:

The Poles of the Earth
Source : http://www.calendarinthesky.org
1. Earth's Magnetic Pole
Have you ever had a compass? the compass you have will show you the direction of North, East, South and West. This direction is a magnetic direction. The direction indicated by the compass is the result of the pulling force of the Earth's magnetic poles.
The Earth's magnetic pole is not right at the Earth's axis, the Earth's magnetic pole position is fluid, the North direction is indicated as a magnetic North that is affected by the gravitational pull force of the earth, so it has a different value every day, and every where.

2. Earth's Geography Pole
This pole is the original axis of the earth, its position remains at one point, and does not change. The polar position is at 90 degrees from the Equator (North Pole), and also -90 degrees from the Equator (South Pole). The rotation motion of the earth for approximately 24 hours rotates through this axis.
Inclination and Declination of The Compass
Source : http://digilander.libero.it
Compass is a tool that use the magnetic poles of the earth. Although the compass does not show the right direction, it can still be used accurately (leading to Earth's geographical poles) with some corrections, such as declination and inclination.
Magnetic declination is a horizontal shift toward the east or the west. Magnetic Inclination is a vertical shift toward the north or east direction of the compass. The value of this declination changes every day, we can check at Magnetic Declination. Meanwhile, the inclination value varies everywhere, depending on the position of the compass in the latitude. If the compass is in the southern latitudes, then the inclination of the compass will lean towards the south, and vice versa.

Points of The Compass
Source : https://en.wikipedia.org
Point of Compass is a guide to determine direction, usually used in Navigation system. There are 8 principle directions in this point of the compass system. Namely : North, Northeast, East, Southeast, South, Southwest, West, Northwest.
There are several ways to know the true winds, one of them is by using a compass as I mentioned above. Another way is to use the Sun :

1. Shortest shadow
Plug the stick to the ground in a flat position. With this method we are only looking for the shortest shadow when meridian pass/zawal (Sun at the zenith point), then we see the Sun declination value, if the declination of the Northern Sun is positive, so the shadow of the Sun points south direction, if the declination is South or the value is negative, so the shadow of the Sun leads North direction. But this method has a weakness, if the Sun is right above where we are, so there will be no shadow.

2. Shadows before and after Merpass / zawal
Plug the stick to the ground in a flat position, then make 1 to 3 circles around the stick with the stick as the center point. Observe before merpass, and observe the shadow that the end of the line touching the circle lines you have created. And make a point on the tangent. Observe after merpass, and observe the shadow that the end of the line touching the circle lines you have created. And make a point on the allusion. Connect the 2 points. The first point shows the true West direction, the second point shows of the true East direction.

3. Use the azimutal value of the Sun
This method is practically easier, but this method uses calculations. the first way is Shooting the Sun, then Counting the azimut of the Sun and then pointing towards 0 value (True North).

The above ways will be explained in another article.

Crescent Image Results : Dzulhijjah 1438.

thumbnail
The observation of Crescent on Dzulhijjah in Indonesia was done on August 22, 2017. at that time I obseved in Condrodipo Hill, Gresik, Indonesia. This place is a very special, why is it like that? because in this place there are often reports that the crescent is seen, although in other places not seen. It is also happening on the Crescent observation at Dzulhijjah 1438 yesterday. Hilal was successfully viewed by 5 people. 5 people are not including me, because I have never seen a Crescent before. Indeed, I feel seeing the Crescent vaguely, but I am not sure about it. so I decided to believe that I did not see.

Crescent Image
Crescent Capture
5 successful observations in the condrodipo were performed with the naked eye, observations using cameras, telescopes, binoculars and theodolites failed to occur. I am confused with it. why so, theoretically it is impossible to happen, the limited view of the eye can overpower by the view of very sophisticated optical devices.

Before going home, I tried to ask for the image from the camera that connected to the telescope and I got 38 photos of the recording result when the hilal observation. The photoa are taken with the same settings, JPEG format, ISO 1600, Exposure 1/5" and f/3.5.

Cresent Observation Image
Cresent Observation Image at 17:46 UTC +7 

Cresent Observation Image
Cresent Observation Image at 17:50 UTC +7

I spent days trying to observe by enlarging the photographs, observing point by point, line by line, angular by angle but no results.

Then I have the initiative to edit the photo in photoshop. I set its contrast, its black and white, its exposure and I succeed to do it.

Below, the results of the edited image:

Edited Image
 Edited Image at 17:46 UTC +7
Pointing Crescent Image Result
Pointing Crescent Image Result at 17:46 UTC+7
The Crescent Image Result
The Crescent Image Result at 17:46 UTC +7
Edited Image
Edited Image at 17:50 UTC +7
Pointing Crescent Image Result
Pointing Crescent Image Result at 17:46 UTC+7
The Crescent Image Result
The Crescent Image Result at 17:50 UTC +7

Of these results there are still irregularities, why the position of the Crescent at 17:50 higher than at 17:46? My hypothesis, this happens because the telescope setting is still using Sun Speedrate, not using Lunar Speedrate.

The Crescent above is very difficult to see and edit, because several factors of the wrong arrangement. in the photo is not supposed to wear high ISO, it is better to use low ISO with long Exposure. And the format of the image is also better using the RAW format for easy editing and searching, not the JPEG format.

The Universe is Not a God

thumbnail
The feast of Eid al-Adha is a day to commemorate the Prophet Ibrahim's incident that is willing to slaughter his son, the prophet who is willing to do anything for the sake of his God. God of the universe, the God who created the heavens, the earth and the whole.
universe is not a good
Allah is the creator of this universe
In addition to the story of slaughter of Prophet Ismail by Prophet Ibrahim, there is something quite interesting from the story of the prophet Ibrahim, that is when the journey of Prophet Ibrahim looking for his God. Prophet Ibrahim traveled for days to seek his God, and he observed all the objects of the universe, from the stars, the moon and the Sun. this story is in the Qur'an Surah Al-An'am verse 75-79 :

Verse 75 :
وَكَذَلِكَ نُرِي إِبْرَاهِيمَ مَلَكُوتَ السَّمَاوَاتِ وَالأرْضِ وَلِيَكُونَ مِنَ الْمُوقِنِينَ
"And thus We show Abraham the signs of the glory (We who are) in the heavens and the earth, and (We show them) that Ibrahim is of the believers."

Verse 76 :
فلما جن عليه الليل رأى كوكبا قال هذا ربي فلما أفل قال لا أحب الآفلين
"When the night has darkened, he sees a star (then) he says: "This is my Lord" But when the star drowned he said: "I do not like the drowning ones".

Verse 77 :
فلما رأى القمر بازغا قال هذا ربي فلما أفل قال لئن لم القوم الضالين
"Then when he saw the rising moon he said:" This is my Lord ". But when the moon sets, he says: "If my Lord has not guided me, I will be among the heretics."

Verse 78 :
فلما رأى الشمس بازغة قال هذا ربي هذا أكبر فلما أفلت قال يا قوم إني بريء مما تشركون
"Then when he saw the rising sun he said:" This is my Lord, this is the greater one ", so when the sun sets, he says:" O my people! I am detached from what ye associate (the Sun). "


Verse : 79
إني وجهت وجهي للذي فطر السماوات والأرض حنيفا وما أنا من المشركين
"Verily I have exposed myself to the Lord who created the heavens and the earth tending to true religion, and I am not of those who associate the God."

Explanation :
In the above verses, Allah ordered the Prophet Muhammad to narrate the propagation of Prophet Ibrahim who invites humans to be religious monotheism and avoids the worship of a statue that brings human to error, accompanied by strong reasons and evidence. The universe and all its contents are powerful to prove the unity of God and the wickedness of the idolaters (Musyrikiin).

Verse 75.
In this verse Allah gives an explanation again, how Allah revealed the majesty of his creation in the heavens and the earth. Allah revealed to Ibrahim the heavenly bodies of varying shapes and arrangements, all of them circulating according to each rule on a regular basis. Earth consisting of layers that contain lots of minerals and jewelry, is very useful and give many benefit to humans.
All of that is a proof of Allah's majesty, which can be understood by human, by thinking according to his word (Al-Qur'an).
Allah also explains the purpose of the introduction of Ibrahim to the beauty of his creation, in order to be made evidences in preaching to unbelieving idolaters (Musyrikiin), and become a guide for him to be someone who truly believe in the unity of Allah.

Verse 76.
After that Allah explained the process of introducing Ibrahim to God in details explanation. first experience of Prophet Ibrahim when looking at the stars. at the time the stars appear to glow and when the star is not glowing.
Ibrahim saw a brightest star. Then the question arises in his heart. "Is this my Lord? But after the star sank and disappeared from his view, there was a belief that he was unhappy with the drowning and disappearing, let alone regarding it as God.
This was the reason of Ibrahim to break the faith of his people that "all that changed was not deserved to be a God". The conclusion of Ibrahim is the conclusion of the right way of thinking that accordance with nature. And anyone who makes same observations so they will produce same conclusion.

Verse 77.
This verse is similar to the previous verse. Allah also explains the observation of the Prophet Ibrahim against the luminous celestial bodies and the greater, it is the Moon.
After the Prophet Ibrahim saw the rising Moon, an impression came to his heart to say, "Is this my Lord?" Then after the moon sets out from the horizon and disappears from his view, he gives the same statement as when he saw the stars set, to his people to know that the Moon is also not God. The second statement of the prophet Ibrahim is more appealing than the first.

Verse 78.
Allah tells his stronger insinuation. That is the observation of the Prophet Abraham to the sun, the most luminous celestial bodies in the universe,
When he sees the sun rising on the horizon, he says "What I see now is my Lord, It is greater than the Stars and the Moon." But after the sun set and disappeared from his view, he issued a warning to his people: "O my people, actually I escape from what you worship."
This insinuation is the stronger insinuation to silence his people so that they do not make any argument to deny the truth brought by Ibrahim.

Verse 79.
After some of his observations Ibrahim devoted himself to worshiping to Allah who created the heavens and the earth.
Ibrahim tended to the religion of monotheism (a religion that held that God is one) and stated that other religions were void, and he was not among the polytheists. The Universe is not a God, and the God is the only one. 

Islamic Astronomy Software : Digital Falak

thumbnail
Android is a linux-based operating system for mobile phones such as smartphones and tablet PC. Android provides an opensouce platform for developers to create their own applications for use by a variety of mobile devices.

Android already has some changes starting from android version 1.1 to the current android version 7.0. Of course with the development and improvement of android, the users were involved to develop various applications, both for personal and public purposes.

Android development is also up in the field of Islamic Astronomy. The "Digital Falak" app is one of the applications of Islamic Astronomy based on android, created by Ahmad Tholhah Ma'ruf published in the Playstore. The application is made in 2012 but in 2014 this new application is released. And in the middle of 2015 this app is officially uploaded in Playstore and can be used by many people especially for android users. Download this app in Playstore or in Digital Falak Web
.
Digital Falak Icon
Digital Falak contains several programs, there is Prayer Time, Qibla Compass, Hijri Calendar, Location Data, and Istiwak Time.
Local Prayer Time and Masehi Calendar
• Prayer Time.
Prayer Time in this application displays some data that is: the time of salat Zuhr, Asar, Magrib, Isha, Imsak, Dawn (Fajr), Thulu, and Duha. Available in 2 time, local time and istiwak time. We can also adjust the criteria and ihtiyath time in the setting menu. The prayer time in this application also has the alarm for remember us to do pray.
Istiwa Prayer Time and Hijri Calendar
• Hijri Calendar
The Hijri calendar in Digital Falak uses the two-book method of making it by using "Fathu al-Rouf al-Manan" and "Nurul anwar". Users just choose which books to use in the settings menu. there is also Masehi/public Calendar

Qibla Compass and Rashdul Qibla Calculation
• The Qiblah Compass
The Qiblah compass is quite easy to understand especially for who do not know the calculation of the Islamic Astronomy, because in it already has a Qibla Compass program, the direction shown by the compass will face the qibla, but this application has a weakness, because the base of the compass using magnetic sensor, then this application is very influential with the magnetic force that surrounds the user.
The Qibla Compass feature also requires magnetic sensors, so for mobile devices that do not have magnetic sensors can not use this feature. Instead there is also a feature Rashdul Qibla calculation, the calculation of the time where the shadow of the Sun will face the qibla.

Location Data Menu
• Location data
Location data in digital falak can be used to find the latitude, longitude, height of place, time zone and place name according to the position in GPS. This data is always updated and can also update by using the internet after the phone is connected to the internet.

This application also there is a version of the website, we will discuss in the next article.

Operational Telescope : Ioptron Versa 108 ED APO OTA with Ioptron Minitower II-8300-2G Mount

thumbnail
A. The Parts
The Parts of OTA
The Parts of OTA
1. Telescope Tubes
2. Objective Lenses
3. Lens Fence
4. Tube Clamps
5. Clamp Key
6. Focuser Hinges Key
7. Eyepiece Placement Hole
8. Focuser
9. Eyepiece Key
10. Focuser Key

The Part of Mount
The Part of Mount
1. Clamp Lock
2. Telescope Tube Clamps
3. Mount Hinges
4. Azimut / Horizontal Key
5. Screw Regulator of the Square
6. Southern Sign
7. Waterpass
8. Vertical Hinge Key
9. Balancing Counter Key
10. Iron Measuring Equilibrium
11. Load Balancer
The Button of Controller

B. Specifications
1. OTA (Optical Tube Assembly)
Aperture: 108mm
Focal Length: 648mm
Ratio: F6
Lens Type: 2 elements Air-spaced ED S-FPL51 + S-NBM51 glass
Focuser: 2 ", 360 ° Rotatable 1:11 Crayford dual speed focuser
Tube Length: 535 mm (Fully Retractable)
Tube Weight: 12 lbs.

2. Mount
Mount: AltAzimuth Mount, Equatorial mount with special tripod
Body Materials: Aluminum
Motor: Dual-Axis DC Servomotor, DC12V
Speed: Dual-Axis, 9-Gear, Electronic (1 × 2 ×, 8 ×, 16 ×, 64 ×, 128 ×, 256 ×, 512 ×, MAX)
GPS: 32-channel GPS
GOTO System: GOTONOVATM 130,000 objects database
GOTO accuracy: 1 Arc Min. (Typical)
Tracking: Automatic
Battery: AA x 8 (Not Included)
Power Requirement: DC 12V ± 2V,> 1.2A
USB Port: Yes
Protocol : ASCOM
Firmware Upgrade: Yes
Computer Control: Yes

C. Usage

1. Installation (assemblying)
Installation of the device consists of a tripod, mount, telescope, ballast, hand controller, and others so that all installed properly and ready to operate.
One of the most important things in this step is balancing between the telescope with the balancer. The unbalanced state will affect the accuracy when tracking.
In addition, leveling (flattening position) of the tripod should also be considered, using the waterpas or (bubble level indicator) found on the bottom of the mount.

2. Initial Position Settings
Positioning the telescope on home position (parking position) or initial condition correctly. For the Ioptron MiniTower II telescope with Altazimuth Mode, the home position is facing the mount to the South and the OTA position is raised to the zenith. At this positioning stage the compass is required to show the exact South direction.

3. Operational
A. Set Up Controller
There are some important settings that need to be set:
1. Time
2. Time Zone
3. Coordinate Place
4. Mount type

B. Alignment
Although telescope already directed to the South and Zenith, but adjustments to the state of the sky (calibration) still needs to be done, because not necessarily our telescope is pointed to the South and Zenith appropriately.
There are several calibrations that can be done:
1. One Star Alignment
2. Two Star Alignmnet
3. Three Star Alignment
4. Polaris Position Alignment
The suggested calibration is calibration with 3 stars or with Polaris, but for locations with southern latitudes, Polaris calibration can not be used, because Polaris stars can not be observed in the southern latitudes.
Calibration of 3 stars can only be used at nighttime, in the daytime no stars can be observed cause the stars beaten by the sun, so for daytime observation, or Crescent observation for "rukyatul hilal", can be done  Sun Position calibration .
The calibration of the Sun position is not in the "One Star Alignment" menu, so we use another method, "Slew and Sync" menu, we navigate to the Sun in the "Select and Slew" option, then we sync the Sun's observations on the telescope lens with the "Sync to Target" option.

C. Tracking
After the data is loaded, and calibration is done, we can select the object to be observed by selecting "Select and Slew" menu. This menu provides various objects that can be observed. There are about 13,000 objects in this mount database. By pressing "enter" the tracking process can automatically be done.
Display on the Controller
D. Focusing
This stage is to be done to sharpen the image produced on the eyepiece lens, this stage is done by turning Focuser on OTA until our eyes feel comfortable to see the object, and the result object is not blur. Each observer's individual eye is different in focus settings, this is because of the possibility of eye defects in the eye's lens
.
E. Setup Tracking
The next stage is to set tracking speed, there are several options:
1. Sidereal Speed ​​/ Celestial Speed, observations for the stars
2. Solar Speed, Observations for the Sun and the Planet
3. Lunar Speed, Observation for the Moon / Crescent

Examples for Qibla Calculation in Indonesia

thumbnail
In the previous post has been explained little about the formula of the direction of qibla for the region in Indonesia. so all places in Indonesia can use that formula to serve as a determinant of Qibla direction. Visit this Link. Qibla Formula for Indonesia

In this post, we will give 3 examples of calculations, first at Istiqlal Mosque-Jakarta, Baiturrahman Mosque-Semarang and al-Akbar Mosque-Surabaya.
Coordinate of Ka'ba in Google Earth
These 3 examples will be calculated by the coordinates of the Ka'ba that took from the Google Earth App. The coordinate of Ka'ba is 21˚ 25 '33,67" N and 39˚ 49 '33.27" E.

1. Istiqlal Mosque, Jakarta
Coordinate of Istiqlal in Google Earth

Qibla Calculation For Istiqlal Mosque :
a. Latitude: 6˚ 13' 00,97" S
b. Longitude: 106˚ 50' 11,54" E
Istiqlal Qibla Direction
c. λd = (λx - λx). = (106˚ 50' 11,54" -39˚ 49 '33.27") = 67˚ 0' 38,27"
d. Cotan QD = Tan φk * Cos φx / Sin λd - Sin φx / Tan λd.
Cotan QD = Tan 21˚ 25 '33,67" * Cos -6˚ 13' 00,97" / Sin 67˚ 0' 38,27" - Sin -6˚ 13' 00,97" / Tan 67˚ 0' 38,27".
QD = 64˚ 50' 23,85"
e. QA = 360 - QD
QA = 360 - 64˚ 50' 23,85"
QA = 295˚ 09' 36,15"

2. Baiturrahman Mosque, Semarang
Coordinate of Baiturrahman in Google Earth

Qibla Calculation For Baiturrahman Mosque:
a. Latitude: 6˚ 59' 00,23" S
b. Longitude: 110˚ 26' 45,67" E
Baiturrahman Qibla Direction
c. λd = (λx - λx). = (110˚ 26' 45,67" -39˚ 49 '33.27") = 70˚ 37' 12,4"
d. Cotan QD = Tan φk * Cos φx / Sin λd - Sin φx / Tan λd.
Cotan QD = Tan 21˚ 25 '33,67" * Cos -6˚ 59' 00,23" / Sin 70˚ 37' 12,4" - Sin -6˚ 59' 00,23" / Tan 70˚ 37' 12,4".
QD = 65˚ 30' 9,32"
e. QA = 360 - QD
QA = 360 - 65˚ 30' 9,32"
QA = 294˚ 29' 50,67"

3. al-Akbar Mosque, Surabaya
Coordinate al-Akbar Mosque from Google Earth

Qibla Calculation For al-Akbar Mosque :
a. Latitude: 7˚ 20' 10,95" S
b. Longitude: 112˚ 42' 54,29" E
Al-Akbar Qibla Direction
c. λd = (λx - λx). = (112˚ 42' 54,29" -39˚ 49 '33.27") = 72˚ 53' 21,02"
d. Cotan QD = Tan φk * Cos φx / Sin λd - Sin φx / Tan λd.
Cotan QD = Tan 21˚ 25 '33,67" * Cos -7˚ 20' 10,95" / Sin 72˚ 53' 21,02" - Sin -7˚ 20' 10,95" / Tan 72˚ 53' 21,02".
QD = 65˚ 56' 13,92"
e. QA = 360 - QD
QA = 360 - 65˚ 56' 13,92"
QA = 294˚ 03' 46,08"

From the 3 examples above can be concluded that true the direction of the Indonesia is North West, its value is about 294 degrees.
Additional added :
- Remember! that the value of North latitude and East longitude is positive and the value of South latitude and West longitude is negative. Visit Spherical Earth System.
- In the trigonometry formula above use Cotangen formula, if you using a calculator or excel program can use :
For Excel Atan (1/(Tan φk *......)) or Atan((Tan φk *.......)^-1)
For the Scientific calculator change "Atan" with "Shiftan".

Calculation of Qibla Direction for Indonesian Places

thumbnail
Indonesian Map's
Indonesian Map's
Indonesia is located on the east of the Ka'ba, and is in the south of the Ka'ba, so in logical direction, the direction of the qibla in Indonesia leads to the North West. there are some data that must be searched first to calculate the direction of qibla, that is:

1. Latitude of Ka'ba (φk)
2. Longitude of Ka'ba (λx)
3. Latitude Place (φx)
4. Longitude Place (λx)

For Latitude and Longitude data Ka'ba is usually constant / fixed, but some people vary in its determination, one of the Ka'ba coordinate value ​​used is 21˚ 25 ' 21,01" N and 39˚ 49' 34,33" E. For coordinate data for the place can be searched with various tools, such as GPS. visit this link. Determine Coordinate with GPS.

This calculation uses the assumption that the Earth is a sphere, so this way using the Spherical Algorithm theory. The steps must be taken as follows:

1. Finding the longitude difference (λd) with the formula : λd = (λx - λx).
2. Finding the qibla direction angle (QD) with the formula: Cotan QD = Tan φk * Cos φx / Sin λd - Sin φx / Tan λd.
3. Then finding qibla azimuth value (QA) with the formula: QA = 360 - QD

Average Qibla Azimuth of Indonesia
The direction of the Qiblah that we count, measured from the True North clockwise to the value of the azimuth angle. For the example calculations will be discussed at the next session.

The Change of Qibla Direction 2

thumbnail
In the previous article, has been described how the potential for changes qibla direction at someplace that caused by the earthquake. Visit this Link! The Change of Qibla Direction.

Now, in this article we will describe one example of the shift of coordinates that caused by the earthquake, and the changing direction of qibla. How big is it? And how big is the change?

Sample of Qibla Direction Change
Simulation of The Change of Qibla Direction
One of the mosques we have sampled is the Baiturrahim mosque in Ule Lheue, Aceh, Indonesia. One of the areas that was hit by the Tsunami on December 26, 2004 with a strength 9.3 Mw. The tsunami was the result of an earthquake in the Indian Ocean, which took victims from six countries : Indonesia, India, Sri Lanka, Thailand, the Maldives and Somalia.

Tsunami
Simulation of Tsunami 2004 in Indian Ocean
Source : Wikipedia.com
Please see some image below, these images we got from Google satellite imagery in Google Earth App, in a few different times.

The Shift of The Baiturrahim Mosque
Image 1 : The Capture of Baiturrahim 2004
Image 1: Satellite images taken on June 23, 2004, before the earthquake occured. in this figure there is the coordinate value of the roof of the Baiturrahim Mosque is 5˚ 33 '21.4 "N and 95˚ 17' 1.7" E.


The Shift of The Baiturrahim Mosque
Image 2 : The Capture of Baiturrahim 2005

Image 2 : Satellite images on January 28, 2005, images taken several months after the earthquake. the coordinates shifted to 5˚ 33 '20.67 "N and 95˚ 17' 1.61" E. coordinates shifted to the South West.

The Shift of TheMosque
Image 3 : The Capture of Baiturrahim 2009

Image 3: Satellite image on June 16, 2009, image taken 4 years after the earthquake. The coordinates again shifted towards the North East, the coordinates are 5˚ 33 '20.97 "N and 95˚ 17' 2.22" E

The Shift of TheMosque
Image 4 : The Capture of Baiturrahim 2010

Image 4: Satellite images on July 8, 2010, shifting South East to 5˚ 33 '20.9 "N and 95˚ 17' 2.39" E

The Shift of TheMosque
Image 5 : The Capture of Baiturrahim 2017
Image 5 : The last image on January 29, 2017, shifting North East to 5˚ 33 '20.95 "N and 95˚ 17' 2.54" E
The Shift of The Mosque Latitude
Latitude Shift's
The Shift of The Mosque Longitude
Longitude Shift's
Of the drawings, the greatest shift occurred between June 23, 2004 and January 28, 2005. where between the dates there was a very large earthquake. The latitude shifts by 0.73 " to the South and longitude shifts by 0.09" to the West.

There was also a substantial shift, between January 28, 2005 and June 16, 2009, after I searched further, there was also some earthquake that occurred between that date, at Nias, Indonesia in 2005 and at West Sumatra, Indonesia in 2007. The latitude shift by 0.3 " to the North and longitude shifts by 0.61" to the East.

For the other date the shift is not too large, is between 0.05 "- 0.17", because there is no earthquake, the shift according to our, occurs caused by the shift of the earth's plate, but not too large, so it didn't cause an earthquake.

As for the qibla shift, I have calculated the direction of the qibla from some conditions with spherical algorithms calculation, can be seen from the following table:
The Shift of The Mosque qibla
Qibla Direction Shift's
The shifting direction of the qiblah that happened was very small, and almost no effect, less than 0.5". The 0.5" impact was caused by the tsunami that occurred on December 26, 2004. Then the impact of the Nias and West Sumatra earthquakes was less than 0.3", while in other condition, the qibla direction shifted less than 0.2" .

A shift in the direction of qibla is very possible, although the shift is very small, but it should be checked regularly, because if the slight shift is repeated several times it will produce a big shift.

Visit this link for the previous discussion. The Change of Qibla Direction 1