In the previous post, we have discussed about the parts and functions of Celestron Nexstar 4 SE telescope, visit this link Celestron Nexstar 4SE .In this post, we will discuss about the operational of this telescope. here are some guides:
1. Assembling.
a. Set up a tripod and set the plain by using a waterpass.
b. Attach the mount and the telescope tube.
c. Attach the star pointer and calibrate it by adjusting altitude and azimuth knob, keeping the pointer pointing at the same point as the point on the telescope tube.
d. Install the energy. Energy can be obtained by installing 12v AC adapters or by using 8 AA batteries.
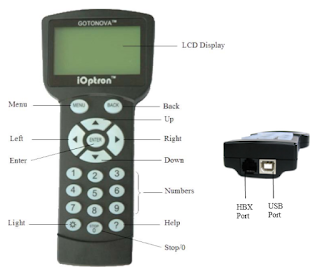
e. Attach the hand control
2. Positioning
There are two positions that can be used to operate the telescope, depending on what method is used :
a. Alt-azimuth Method,
By this method, the operation of the telescope will correspond to the horizontal coordinates, the telescope will move horizontally and vertically. with this method the telescope must be arranged northward with the aid of the compass, then the telescope tube is set to the index position.
b. Equatorial Method
By this method, the operation of the telescope will correspond to the equatorial coordinate, the telescope will move to adjust the declination value and ascensio recta value of celestial body. with this method the latitude stick must be adjusted according to the observer's latitude, then the tube is set at the index position, and the position of the telescope must face to the meridian.
3. Operational
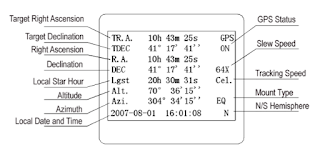
a. Set Up the Controller
There are some rules to set:
- Coordinates, can be input manually or through a city database
- Date
- Time, current time at the time of setting.
b. Alignment
- Sky Align, using this alignment we will be guided by the telescope. telescopes will choose the best celestial bodies to serve as alignment objects, can be stars, planets or other objects that are easy to detect.
- Auto Two-Star Align, using this alignment we will be selected 2 stars automatically to serve as alignment object.
- Two Star Alignment, we need to select manually 2 stars for the alignment object.
- One-Star Align, we need to choose one star for the alignment object.
- Solar System Align, we need to choose one object that include to solar system, that is planet or sun.
- EQ North / EQ South Alignment, this alignment is done when we choose to use equatorial method when doing step positioning. such as some alignment above, this alignment also has some kinds : EQ Auto Align, Two-Star Align EQ, One-Star Align EQ, EQ Solar System Align.
To improve calibration accuracy, choose alignment that supports a large number of sky objects (2 or more), if alignment is done but the accuracy level is bad, so alignment can be fixed with "sync" menu.
c. Tracking
After doing some arrangement as we mentioned above then telescope can be enabled to see the celestial objects automatically and follow it's movement. there are several objects that can be observed, including by using the following menu:
- LIST Menu, to search for sky objects "Named Star, Named Object, Double Stars, Variable Star"
- Catalog menu (M, CALD, NGC, STAR), to search for celestial objects through the number of objects.
- PLANET menu, to search for planetary celestial bodies.
Observation of celestial bodies can also use several methods such as:
- Tour Mode: to see interesting sky objects when observation time
- Constellation Tour: to see and observe the configuration of the stars that make up the constellations.
d. Focusing
This stage is to be done to sharpen the image produced on the eyepiece lens, this stage is done by turning Focuser on OTA until our eyes feel comfortable to see the object, and the result object is not blur. Each observer's individual eye is different in focus settings, this is because of the possibility of eye defects in the eye's lens
e. Setup Tracking
Telescopes can follow the movement of celestial bodies, but it must be set in advance setup tracking with 2 settings:
- Tracking Mode, must adapt to the telescope mounting method. (Alt-Az, EQ North, EQ South)
- Tracking Rate, must adjust to the object being observed (Sideral, Lunar, Solar).
If yo want to compare the method of this telescope with other telescope visit this link. Opertional Telescope : Ioptron Minitower II.
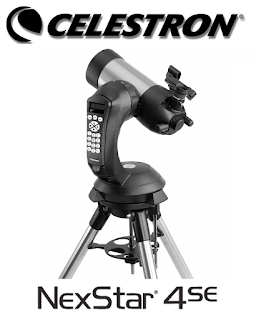 |
| Source : Manual Book Celestron Nexstar 4 SE |
a. Set up a tripod and set the plain by using a waterpass.
b. Attach the mount and the telescope tube.
c. Attach the star pointer and calibrate it by adjusting altitude and azimuth knob, keeping the pointer pointing at the same point as the point on the telescope tube.
d. Install the energy. Energy can be obtained by installing 12v AC adapters or by using 8 AA batteries.
e. Attach the hand control
2. Positioning
There are two positions that can be used to operate the telescope, depending on what method is used :
a. Alt-azimuth Method,
By this method, the operation of the telescope will correspond to the horizontal coordinates, the telescope will move horizontally and vertically. with this method the telescope must be arranged northward with the aid of the compass, then the telescope tube is set to the index position.
b. Equatorial Method
By this method, the operation of the telescope will correspond to the equatorial coordinate, the telescope will move to adjust the declination value and ascensio recta value of celestial body. with this method the latitude stick must be adjusted according to the observer's latitude, then the tube is set at the index position, and the position of the telescope must face to the meridian.
3. Operational
a. Set Up the Controller
There are some rules to set:
- Coordinates, can be input manually or through a city database
- Date
- Time, current time at the time of setting.
b. Alignment
- Sky Align, using this alignment we will be guided by the telescope. telescopes will choose the best celestial bodies to serve as alignment objects, can be stars, planets or other objects that are easy to detect.
- Auto Two-Star Align, using this alignment we will be selected 2 stars automatically to serve as alignment object.
- Two Star Alignment, we need to select manually 2 stars for the alignment object.
- One-Star Align, we need to choose one star for the alignment object.
- Solar System Align, we need to choose one object that include to solar system, that is planet or sun.
- EQ North / EQ South Alignment, this alignment is done when we choose to use equatorial method when doing step positioning. such as some alignment above, this alignment also has some kinds : EQ Auto Align, Two-Star Align EQ, One-Star Align EQ, EQ Solar System Align.
To improve calibration accuracy, choose alignment that supports a large number of sky objects (2 or more), if alignment is done but the accuracy level is bad, so alignment can be fixed with "sync" menu.
c. Tracking
After doing some arrangement as we mentioned above then telescope can be enabled to see the celestial objects automatically and follow it's movement. there are several objects that can be observed, including by using the following menu:
- LIST Menu, to search for sky objects "Named Star, Named Object, Double Stars, Variable Star"
- Catalog menu (M, CALD, NGC, STAR), to search for celestial objects through the number of objects.
- PLANET menu, to search for planetary celestial bodies.
Observation of celestial bodies can also use several methods such as:
- Tour Mode: to see interesting sky objects when observation time
- Constellation Tour: to see and observe the configuration of the stars that make up the constellations.
d. Focusing
This stage is to be done to sharpen the image produced on the eyepiece lens, this stage is done by turning Focuser on OTA until our eyes feel comfortable to see the object, and the result object is not blur. Each observer's individual eye is different in focus settings, this is because of the possibility of eye defects in the eye's lens
e. Setup Tracking
Telescopes can follow the movement of celestial bodies, but it must be set in advance setup tracking with 2 settings:
- Tracking Mode, must adapt to the telescope mounting method. (Alt-Az, EQ North, EQ South)
- Tracking Rate, must adjust to the object being observed (Sideral, Lunar, Solar).
If yo want to compare the method of this telescope with other telescope visit this link. Opertional Telescope : Ioptron Minitower II.

