Crescent Image Results : Dzulhijjah 1438.

thumbnail
The observation of Crescent on Dzulhijjah in Indonesia was done on August 22, 2017. at that time I obseved in Condrodipo Hill, Gresik, Indonesia. This place is a very special, why is it like that? because in this place there are often reports that the crescent is seen, although in other places not seen. It is also happening on the Crescent observation at Dzulhijjah 1438 yesterday. Hilal was successfully viewed by 5 people. 5 people are not including me, because I have never seen a Crescent before. Indeed, I feel seeing the Crescent vaguely, but I am not sure about it. so I decided to believe that I did not see.

Crescent Image
Crescent Capture
5 successful observations in the condrodipo were performed with the naked eye, observations using cameras, telescopes, binoculars and theodolites failed to occur. I am confused with it. why so, theoretically it is impossible to happen, the limited view of the eye can overpower by the view of very sophisticated optical devices.

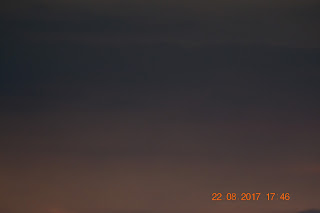
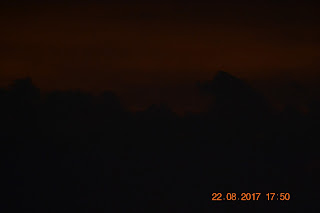
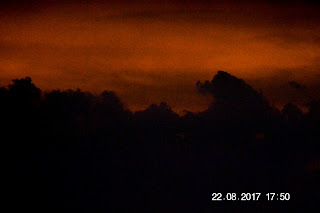
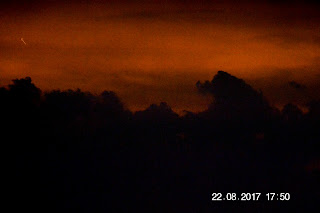
Before going home, I tried to ask for the image from the camera that connected to the telescope and I got 38 photos of the recording result when the hilal observation. The photoa are taken with the same settings, JPEG format, ISO 1600, Exposure 1/5" and f/3.5.

Cresent Observation Image
Cresent Observation Image at 17:46 UTC +7 

Cresent Observation Image
Cresent Observation Image at 17:50 UTC +7

I spent days trying to observe by enlarging the photographs, observing point by point, line by line, angular by angle but no results.

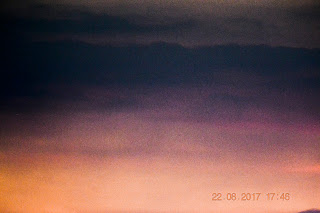
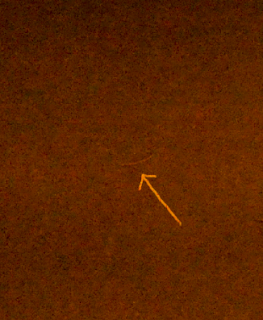
Then I have the initiative to edit the photo in photoshop. I set its contrast, its black and white, its exposure and I succeed to do it.

Below, the results of the edited image:

Edited Image
 Edited Image at 17:46 UTC +7
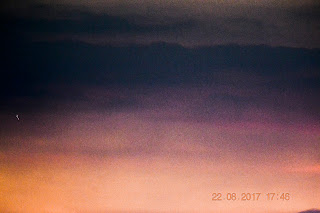
Pointing Crescent Image Result
Pointing Crescent Image Result at 17:46 UTC+7
The Crescent Image Result
The Crescent Image Result at 17:46 UTC +7
Edited Image
Edited Image at 17:50 UTC +7
Pointing Crescent Image Result
Pointing Crescent Image Result at 17:46 UTC+7
The Crescent Image Result
The Crescent Image Result at 17:50 UTC +7

Of these results there are still irregularities, why the position of the Crescent at 17:50 higher than at 17:46? My hypothesis, this happens because the telescope setting is still using Sun Speedrate, not using Lunar Speedrate.

The Crescent above is very difficult to see and edit, because several factors of the wrong arrangement. in the photo is not supposed to wear high ISO, it is better to use low ISO with long Exposure. And the format of the image is also better using the RAW format for easy editing and searching, not the JPEG format.

Operational Telescope : Ioptron Versa 108 ED APO OTA with Ioptron Minitower II-8300-2G Mount

thumbnail
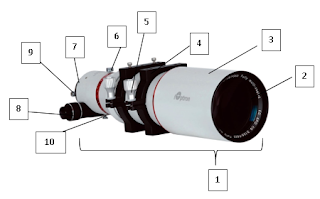
A. The Parts
The Parts of OTA
The Parts of OTA
1. Telescope Tubes
2. Objective Lenses
3. Lens Fence
4. Tube Clamps
5. Clamp Key
6. Focuser Hinges Key
7. Eyepiece Placement Hole
8. Focuser
9. Eyepiece Key
10. Focuser Key
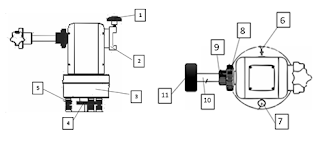
The Part of Mount
The Part of Mount
1. Clamp Lock
2. Telescope Tube Clamps
3. Mount Hinges
4. Azimut / Horizontal Key
5. Screw Regulator of the Square
6. Southern Sign
7. Waterpass
8. Vertical Hinge Key
9. Balancing Counter Key
10. Iron Measuring Equilibrium
11. Load Balancer
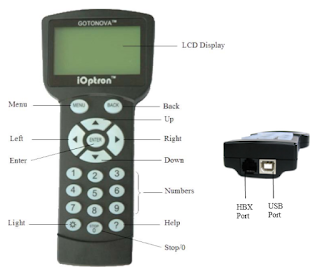
The Button of Controller

B. Specifications
1. OTA (Optical Tube Assembly)
Aperture: 108mm
Focal Length: 648mm
Ratio: F6
Lens Type: 2 elements Air-spaced ED S-FPL51 + S-NBM51 glass
Focuser: 2 ", 360 ° Rotatable 1:11 Crayford dual speed focuser
Tube Length: 535 mm (Fully Retractable)
Tube Weight: 12 lbs.

2. Mount
Mount: AltAzimuth Mount, Equatorial mount with special tripod
Body Materials: Aluminum
Motor: Dual-Axis DC Servomotor, DC12V
Speed: Dual-Axis, 9-Gear, Electronic (1 × 2 ×, 8 ×, 16 ×, 64 ×, 128 ×, 256 ×, 512 ×, MAX)
GPS: 32-channel GPS
GOTO System: GOTONOVATM 130,000 objects database
GOTO accuracy: 1 Arc Min. (Typical)
Tracking: Automatic
Battery: AA x 8 (Not Included)
Power Requirement: DC 12V ± 2V,> 1.2A
USB Port: Yes
Protocol : ASCOM
Firmware Upgrade: Yes
Computer Control: Yes

C. Usage

1. Installation (assemblying)
Installation of the device consists of a tripod, mount, telescope, ballast, hand controller, and others so that all installed properly and ready to operate.
One of the most important things in this step is balancing between the telescope with the balancer. The unbalanced state will affect the accuracy when tracking.
In addition, leveling (flattening position) of the tripod should also be considered, using the waterpas or (bubble level indicator) found on the bottom of the mount.

2. Initial Position Settings
Positioning the telescope on home position (parking position) or initial condition correctly. For the Ioptron MiniTower II telescope with Altazimuth Mode, the home position is facing the mount to the South and the OTA position is raised to the zenith. At this positioning stage the compass is required to show the exact South direction.

3. Operational
A. Set Up Controller
There are some important settings that need to be set:
1. Time
2. Time Zone
3. Coordinate Place
4. Mount type

B. Alignment
Although telescope already directed to the South and Zenith, but adjustments to the state of the sky (calibration) still needs to be done, because not necessarily our telescope is pointed to the South and Zenith appropriately.
There are several calibrations that can be done:
1. One Star Alignment
2. Two Star Alignmnet
3. Three Star Alignment
4. Polaris Position Alignment
The suggested calibration is calibration with 3 stars or with Polaris, but for locations with southern latitudes, Polaris calibration can not be used, because Polaris stars can not be observed in the southern latitudes.
Calibration of 3 stars can only be used at nighttime, in the daytime no stars can be observed cause the stars beaten by the sun, so for daytime observation, or Crescent observation for "rukyatul hilal", can be done  Sun Position calibration .
The calibration of the Sun position is not in the "One Star Alignment" menu, so we use another method, "Slew and Sync" menu, we navigate to the Sun in the "Select and Slew" option, then we sync the Sun's observations on the telescope lens with the "Sync to Target" option.

C. Tracking
After the data is loaded, and calibration is done, we can select the object to be observed by selecting "Select and Slew" menu. This menu provides various objects that can be observed. There are about 13,000 objects in this mount database. By pressing "enter" the tracking process can automatically be done.
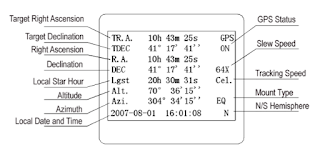
Display on the Controller
D. Focusing
This stage is to be done to sharpen the image produced on the eyepiece lens, this stage is done by turning Focuser on OTA until our eyes feel comfortable to see the object, and the result object is not blur. Each observer's individual eye is different in focus settings, this is because of the possibility of eye defects in the eye's lens
.
E. Setup Tracking
The next stage is to set tracking speed, there are several options:
1. Sidereal Speed ​​/ Celestial Speed, observations for the stars
2. Solar Speed, Observations for the Sun and the Planet
3. Lunar Speed, Observation for the Moon / Crescent

Islamic Astronomy Tools : Celestron Nexstar 4 SE

thumbnail
In studying a science, of course there are theories and also field practice, studying physics and biology must definitely practice in the laboratory, learning sports science should definitely practice in the field, learning the language of science should also practice in the language laboratory.

The need for practice in learning a science is a necessity, as well as the science of Islamic Astronomy. according to some people's understanding, Islamic Astronomy deals with the calculations of heavenly bodies, but they are useless if they are not applied in the field. there are several tools that become the needs of the astronomers, one of which is the telescope. In Islamic Astronomy the telescope is usually used for rukyatul hilal (observing the crescent) in the determination of lunar calendar, or for eclipse observation.

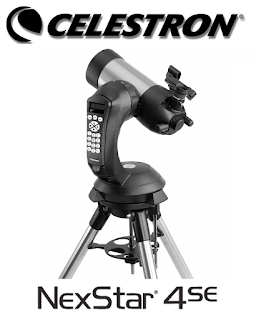
Celestron Nextstar 4 SE
Source : https://www.celestron.com
This time I will discuss a bit about the use and specifications of Celestron Nexstar 4 SE telescope.

CELESTRON NEXSTAR 4 SE

The telescope has two functions, the first of which serves as a horizontal telescope, and the second serves as an equatorial telescope. This is one of the advantages of this telescope. for the tube type is a reflector telescope with a cassegrain telescope design.

Telescope parts:

The Part of Celestron Nextstar 4 SE
Source : https://www.celestron.com
1. Optical Tube, the main part of the telescope, in this section will occur light reflection, which will then produce images of distant objects.

2. Star Pointer Finderscope, this section serves to make it easier when shooting sky objects.

3. Eyepiece, this part is the ocular lens of the telescope, this lens can also be changed to adjust the magnification of the telescope.

4. Focuser Knob, this section is used to adjust the focus of the telescope image. This section should always be arranged, especially if we replace eyepiece or change of observer, so that picture is always sharp.

5. Threaded Photographic Adapter, an adapter for SLR / DSLR cameras that have been connected by T-ring

6. Flip Mirror Control, Flip Glass used for image selection, whether light is forwarded to the camera ?, or is reflected to eyepiece ?.

7. Battery Compartment, Battery Place, this telescope needs 8 batteries to run it.

8. Tripod, this part is the foot of the telescope that supports mounting and tubes. This section is also commonly used to regulate the flatness of the telescope.

9. Accessory Tray, place to put various accessory, like eyepiece, T-ring. On the side of the Accessory Tray there is a vertical stick, this stick is used to support when we will use the telescope with equatorial model.

Celestron Nextstar 4 SE Equatorial Mode
Source : https://www.celestron.com
10. ON / OFF Switch, the button to turn the telescope on and off, beside this button is also an AC Adapter input which is used to run telescope without battery.

11. Hand Control, this part is a remote used to control the telescope.

12. Liquid Crystal Display, Screen on the remote, inside is also usually listed coordinates of the telescope and also objects observed celestial objects.

For how to use? please visit this link Operational Celestron NexStar 4SE.