Islamic Astronomy Tools : Celestron Nexstar 4 SE

thumbnail
In studying a science, of course there are theories and also field practice, studying physics and biology must definitely practice in the laboratory, learning sports science should definitely practice in the field, learning the language of science should also practice in the language laboratory.

The need for practice in learning a science is a necessity, as well as the science of Islamic Astronomy. according to some people's understanding, Islamic Astronomy deals with the calculations of heavenly bodies, but they are useless if they are not applied in the field. there are several tools that become the needs of the astronomers, one of which is the telescope. In Islamic Astronomy the telescope is usually used for rukyatul hilal (observing the crescent) in the determination of lunar calendar, or for eclipse observation.

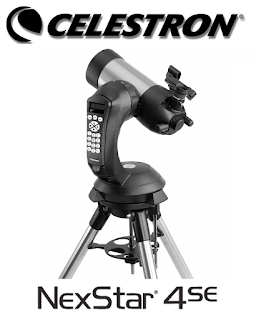
Celestron Nextstar 4 SE
Source : https://www.celestron.com
This time I will discuss a bit about the use and specifications of Celestron Nexstar 4 SE telescope.

CELESTRON NEXSTAR 4 SE

The telescope has two functions, the first of which serves as a horizontal telescope, and the second serves as an equatorial telescope. This is one of the advantages of this telescope. for the tube type is a reflector telescope with a cassegrain telescope design.

Telescope parts:

The Part of Celestron Nextstar 4 SE
Source : https://www.celestron.com
1. Optical Tube, the main part of the telescope, in this section will occur light reflection, which will then produce images of distant objects.

2. Star Pointer Finderscope, this section serves to make it easier when shooting sky objects.

3. Eyepiece, this part is the ocular lens of the telescope, this lens can also be changed to adjust the magnification of the telescope.

4. Focuser Knob, this section is used to adjust the focus of the telescope image. This section should always be arranged, especially if we replace eyepiece or change of observer, so that picture is always sharp.

5. Threaded Photographic Adapter, an adapter for SLR / DSLR cameras that have been connected by T-ring

6. Flip Mirror Control, Flip Glass used for image selection, whether light is forwarded to the camera ?, or is reflected to eyepiece ?.

7. Battery Compartment, Battery Place, this telescope needs 8 batteries to run it.

8. Tripod, this part is the foot of the telescope that supports mounting and tubes. This section is also commonly used to regulate the flatness of the telescope.

9. Accessory Tray, place to put various accessory, like eyepiece, T-ring. On the side of the Accessory Tray there is a vertical stick, this stick is used to support when we will use the telescope with equatorial model.

Celestron Nextstar 4 SE Equatorial Mode
Source : https://www.celestron.com
10. ON / OFF Switch, the button to turn the telescope on and off, beside this button is also an AC Adapter input which is used to run telescope without battery.

11. Hand Control, this part is a remote used to control the telescope.

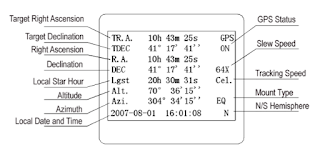
12. Liquid Crystal Display, Screen on the remote, inside is also usually listed coordinates of the telescope and also objects observed celestial objects.

For how to use? please visit this link Operational Celestron NexStar 4SE.

Operational Telescope : Celestron Nexstar 4 SE

thumbnail
In the previous post, we have discussed about the parts and functions of Celestron Nexstar 4 SE telescope, visit this link Celestron Nexstar 4SE  .In this post, we will discuss about the operational of this telescope. here are some guides:
celestron nexstar 4se
Source : Manual Book Celestron Nexstar 4 SE
1. Assembling.
a. Set up a tripod and set the plain by using a waterpass.
b. Attach the mount and the telescope tube.
c. Attach the star pointer and calibrate it by adjusting altitude and azimuth knob, keeping the pointer pointing at the same point as the point on the telescope tube.
d. Install the energy. Energy can be obtained by installing 12v AC adapters or by using 8 AA batteries.
e. Attach the hand control

2. Positioning 
There are two positions that can be used to operate the telescope, depending on what method is used :
a. Alt-azimuth Method,
By this method, the operation of the telescope will correspond to the horizontal coordinates, the telescope will move horizontally and vertically. with this method the telescope must be arranged northward with the aid of the compass, then the telescope tube is set to the index position.
b. Equatorial Method
By this method, the operation of the telescope will correspond to the equatorial coordinate, the telescope will move to adjust the declination value and ascensio recta value of celestial body. with this method the latitude stick must be adjusted according to the observer's latitude, then the tube is set at the index position, and the position of the telescope must face to the meridian.

3. Operational 
a. Set Up the Controller 
There are some rules to set:
- Coordinates, can be input manually or through a city database
- Date
- Time, current time at the time of setting.

b. Alignment
- Sky Align, using this alignment we will be guided by the telescope. telescopes will choose the best celestial bodies to serve as alignment objects, can be stars, planets or other objects that are easy to detect.
- Auto Two-Star Align, using this alignment we will be selected 2 stars automatically to serve as alignment object.
- Two Star Alignment, we need to select manually 2 stars for the alignment object.
- One-Star Align, we need to choose one star for the alignment object.
- Solar System Align, we need to choose one object that include to solar system, that is planet or sun.
- EQ North / EQ South Alignment, this alignment is done when we choose to use equatorial method when doing step positioning. such as some alignment above, this alignment also has some kinds : EQ Auto Align, Two-Star Align EQ, One-Star Align EQ, EQ Solar System Align.

To improve calibration accuracy, choose alignment that supports a large number of sky objects (2 or more), if alignment is done but the accuracy level is bad, so alignment can be fixed with "sync" menu.

c. Tracking
After doing some arrangement as we mentioned above then telescope can be enabled to see the celestial objects automatically and follow it's movement. there are several objects that can be observed, including by using the following menu:
- LIST Menu, to search for sky objects "Named Star, Named Object, Double Stars, Variable Star"
- Catalog menu (M, CALD, NGC, STAR), to search for celestial objects through the number of objects.
- PLANET menu, to search for planetary celestial bodies.

Observation of celestial bodies can also use several methods such as:
- Tour Mode: to see interesting sky objects when observation time

- Constellation Tour: to see and observe the configuration of the stars that make up the constellations.

d. Focusing 
This stage is to be done to sharpen the image produced on the eyepiece lens, this stage is done by turning Focuser on OTA until our eyes feel comfortable to see the object, and the result object is not blur. Each observer's individual eye is different in focus settings, this is because of the possibility of eye defects in the eye's lens

e. Setup Tracking
Telescopes can follow the movement of celestial bodies, but it must be set in advance setup tracking with 2 settings:
- Tracking Mode, must adapt to the telescope mounting method. (Alt-Az, EQ North, EQ South)

- Tracking Rate, must adjust to the object being observed (Sideral, Lunar, Solar).

If yo want to compare the method of this telescope with other telescope visit this link. Opertional Telescope : Ioptron Minitower II.

Operational Telescope : Ioptron Versa 108 ED APO OTA with Ioptron Minitower II-8300-2G Mount

thumbnail
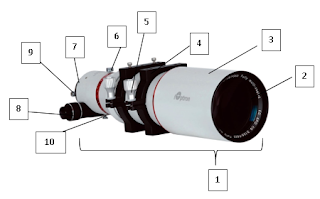
A. The Parts
The Parts of OTA
The Parts of OTA
1. Telescope Tubes
2. Objective Lenses
3. Lens Fence
4. Tube Clamps
5. Clamp Key
6. Focuser Hinges Key
7. Eyepiece Placement Hole
8. Focuser
9. Eyepiece Key
10. Focuser Key

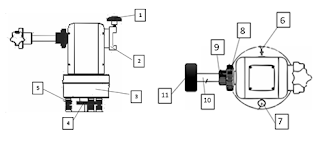
The Part of Mount
The Part of Mount
1. Clamp Lock
2. Telescope Tube Clamps
3. Mount Hinges
4. Azimut / Horizontal Key
5. Screw Regulator of the Square
6. Southern Sign
7. Waterpass
8. Vertical Hinge Key
9. Balancing Counter Key
10. Iron Measuring Equilibrium
11. Load Balancer
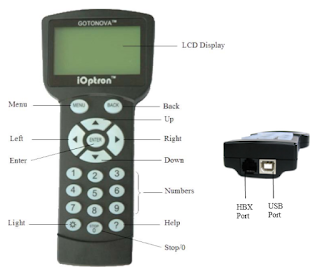
The Button of Controller

B. Specifications
1. OTA (Optical Tube Assembly)
Aperture: 108mm
Focal Length: 648mm
Ratio: F6
Lens Type: 2 elements Air-spaced ED S-FPL51 + S-NBM51 glass
Focuser: 2 ", 360 ° Rotatable 1:11 Crayford dual speed focuser
Tube Length: 535 mm (Fully Retractable)
Tube Weight: 12 lbs.

2. Mount
Mount: AltAzimuth Mount, Equatorial mount with special tripod
Body Materials: Aluminum
Motor: Dual-Axis DC Servomotor, DC12V
Speed: Dual-Axis, 9-Gear, Electronic (1 × 2 ×, 8 ×, 16 ×, 64 ×, 128 ×, 256 ×, 512 ×, MAX)
GPS: 32-channel GPS
GOTO System: GOTONOVATM 130,000 objects database
GOTO accuracy: 1 Arc Min. (Typical)
Tracking: Automatic
Battery: AA x 8 (Not Included)
Power Requirement: DC 12V ± 2V,> 1.2A
USB Port: Yes
Protocol : ASCOM
Firmware Upgrade: Yes
Computer Control: Yes

C. Usage

1. Installation (assemblying)
Installation of the device consists of a tripod, mount, telescope, ballast, hand controller, and others so that all installed properly and ready to operate.
One of the most important things in this step is balancing between the telescope with the balancer. The unbalanced state will affect the accuracy when tracking.
In addition, leveling (flattening position) of the tripod should also be considered, using the waterpas or (bubble level indicator) found on the bottom of the mount.

2. Initial Position Settings
Positioning the telescope on home position (parking position) or initial condition correctly. For the Ioptron MiniTower II telescope with Altazimuth Mode, the home position is facing the mount to the South and the OTA position is raised to the zenith. At this positioning stage the compass is required to show the exact South direction.

3. Operational
A. Set Up Controller
There are some important settings that need to be set:
1. Time
2. Time Zone
3. Coordinate Place
4. Mount type

B. Alignment
Although telescope already directed to the South and Zenith, but adjustments to the state of the sky (calibration) still needs to be done, because not necessarily our telescope is pointed to the South and Zenith appropriately.
There are several calibrations that can be done:
1. One Star Alignment
2. Two Star Alignmnet
3. Three Star Alignment
4. Polaris Position Alignment
The suggested calibration is calibration with 3 stars or with Polaris, but for locations with southern latitudes, Polaris calibration can not be used, because Polaris stars can not be observed in the southern latitudes.
Calibration of 3 stars can only be used at nighttime, in the daytime no stars can be observed cause the stars beaten by the sun, so for daytime observation, or Crescent observation for "rukyatul hilal", can be done  Sun Position calibration .
The calibration of the Sun position is not in the "One Star Alignment" menu, so we use another method, "Slew and Sync" menu, we navigate to the Sun in the "Select and Slew" option, then we sync the Sun's observations on the telescope lens with the "Sync to Target" option.

C. Tracking
After the data is loaded, and calibration is done, we can select the object to be observed by selecting "Select and Slew" menu. This menu provides various objects that can be observed. There are about 13,000 objects in this mount database. By pressing "enter" the tracking process can automatically be done.
Display on the Controller
D. Focusing
This stage is to be done to sharpen the image produced on the eyepiece lens, this stage is done by turning Focuser on OTA until our eyes feel comfortable to see the object, and the result object is not blur. Each observer's individual eye is different in focus settings, this is because of the possibility of eye defects in the eye's lens
.
E. Setup Tracking
The next stage is to set tracking speed, there are several options:
1. Sidereal Speed ​​/ Celestial Speed, observations for the stars
2. Solar Speed, Observations for the Sun and the Planet
3. Lunar Speed, Observation for the Moon / Crescent

Binoculars

thumbnail
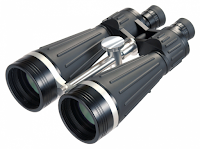
Binoculars are a device that enters the telescope class which means an astronomical device used to magnify the object from a distance, increases the angular size and brightness of the object, but the function of the telescope is actually more in use, not just for the observation of the stars alone , But also used for purposes such as military and shipping. Binoculars of this type is also commonly called "Teropong Medan" (in Indonesia), there are also commonly called "Kiyker". With binoculars objects can be observed stereoscopic (three dimensional)

Binoculars come from the Latin, "bi" meaning two, and "oculus" meaning the eye. As the name implies, this tool has 2 visions / tubes that adjust the amount of our eyes. In it, this binocular has a prism that is used to "fold" the cross-light line so as to produce a shadow in the right direction. With this binocular, the observed objects will be real and will not be reversed.

How binocular lenses work?

Lens Composition

1. Binocular with Erecting Lenses

(Visualization Erecting Lens) 
Source: en.wikipedia.org

This type of binocular can produce zoomed-in / zoom-out as desired, without having to replace eyepiece first. The arrangement for these lenses is Objectif Lens - Erectic Lens - Prism - Eyepiece / Oculer Lens. Erecting Lens position can be shifted, the further position of Erectic Lens from Objectif Lens then the visualization of the observed objects the greater, and vice versa
.
2. Porro Prism Binocular

(Porro Prism Visualization) 
Source: en.wikipedia.org

This type of binoculars has 2 prisms that serve to invert the shadow, the first prism after the objective lens serves to invert the shadow vertically, and the second lens serves to invert the image horizontally. The order is: Objectif Lens - Double Porro Prism - Eyepiece / Oculer Lens.

(Binocular with Porro Prism) 
Source: en.wikipedia.org

This Porro prism produces perfect reflection and refinement. One form of this prism is a 45 ° angled angle, this bracket is used as a double reflector. This prism reverses only one direction using two prisms enforced with each other can be held two-way reversal.

C. Roof Prism Binocular

(Roof Prism Visualization) 
Source: en.wikipedia.org

This type of binoculars has only one prism, and its properties directly invert the shadow horizontally and vertically so that the resulting image is real. This type of binocular physically has a straight appearance because it uses Roof-Prism type prism. The order is: Objective Lens - Roof Prism - Eyepiece / Oculer Lens


(Binocular with Roof Prism) 
Source: en.wikipedia.org

Focuser Position

1. Independent Focus,
Each binocular tube has its own focus regulator. So in the focusing phase just by adjusting the focuser of each binocular tube.

(Binocular with Independent Focus) 
Source: thebinocularshop.com

2. Central focus
Two tubes have only one focuser, but this type of binoculars in one tube usually have a special focuser, this special focuser is required for anisometropic patients

(Binocular with Central Focus) 
Source: 365astronomy.com

Types of Objective Lenses

The outer surface of this objective lens is a protective layer which is usually called a coating. The function of this coating is various, such as anti-reflection, ultra violet filter, light transmition and others. Among the common coatings used in some binoculars are:

1. Red Coating (Ultra Violet Filter)
The red color is dominated for protection in maximum lighting conditions. Binoculars with red coating colors are very well used for daylight in bright light conditions, because they can reduce almost 1/3 light, especially UV light, eg in the desert or hotspot field areas.

2. Blue Coating (Anti Reflection)
The blue color in binocular coating is the most we encounter, blue is the basic coating type, because the standardization of the lens usually must have anti-reflection for each blink of the eye, or reflex light when aiming the target does not make the head become dizzy. Binocular with blue coating is very well used for various conditions, both day and night.

3. Green Coating (Light Transmition)
The green color in the binocular lens is usually a light transmition type of amber stone that is able to drain light on all parts of the image of the captured object lens. Coating type of light transmition is suitable for use in low lighting conditions, eg at dusk or in a dimly lit (not dark without light) so it looks brighter.

4. Multi Coating (Multi Filter)
Not infrequently there are also several other colors, in addition to green, red and blue, such as purple, orange, and others, the color is the result of a combination of multiple coatings combined to benefit from multiple filters.

Types of Mounting

Until now there are no telescope manufacturers that make a special mounting binocular based on semi-automatic (motoric) and automatic (robotic). There is only binocular based hand claps and manual mounting. If you want to use binoculars with automatic mounting or commonly known robotic mounting, can be combined with mounting binoculars with a little modification.

(Modification Celestron Nextar Mount with Orion BT70 Binocular)
Source: id.pinterest.com

Crescent Image Results : Dzulhijjah 1438.

thumbnail
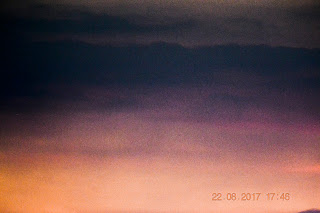
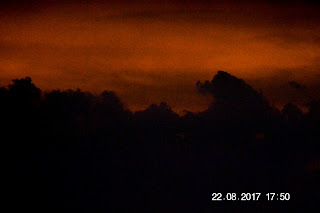
The observation of Crescent on Dzulhijjah in Indonesia was done on August 22, 2017. at that time I obseved in Condrodipo Hill, Gresik, Indonesia. This place is a very special, why is it like that? because in this place there are often reports that the crescent is seen, although in other places not seen. It is also happening on the Crescent observation at Dzulhijjah 1438 yesterday. Hilal was successfully viewed by 5 people. 5 people are not including me, because I have never seen a Crescent before. Indeed, I feel seeing the Crescent vaguely, but I am not sure about it. so I decided to believe that I did not see.

Crescent Image
Crescent Capture
5 successful observations in the condrodipo were performed with the naked eye, observations using cameras, telescopes, binoculars and theodolites failed to occur. I am confused with it. why so, theoretically it is impossible to happen, the limited view of the eye can overpower by the view of very sophisticated optical devices.

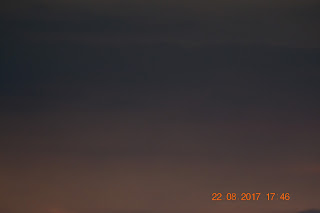
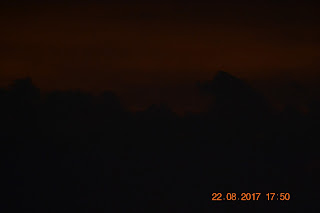
Before going home, I tried to ask for the image from the camera that connected to the telescope and I got 38 photos of the recording result when the hilal observation. The photoa are taken with the same settings, JPEG format, ISO 1600, Exposure 1/5" and f/3.5.

Cresent Observation Image
Cresent Observation Image at 17:46 UTC +7 

Cresent Observation Image
Cresent Observation Image at 17:50 UTC +7

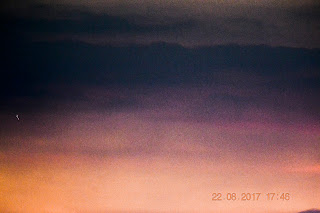
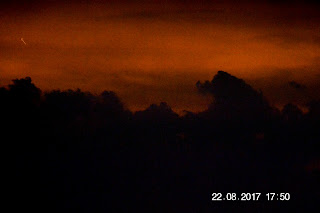
I spent days trying to observe by enlarging the photographs, observing point by point, line by line, angular by angle but no results.

Then I have the initiative to edit the photo in photoshop. I set its contrast, its black and white, its exposure and I succeed to do it.

Below, the results of the edited image:

Edited Image
 Edited Image at 17:46 UTC +7
Pointing Crescent Image Result
Pointing Crescent Image Result at 17:46 UTC+7
The Crescent Image Result
The Crescent Image Result at 17:46 UTC +7
Edited Image
Edited Image at 17:50 UTC +7
Pointing Crescent Image Result
Pointing Crescent Image Result at 17:46 UTC+7
The Crescent Image Result
The Crescent Image Result at 17:50 UTC +7

Of these results there are still irregularities, why the position of the Crescent at 17:50 higher than at 17:46? My hypothesis, this happens because the telescope setting is still using Sun Speedrate, not using Lunar Speedrate.

The Crescent above is very difficult to see and edit, because several factors of the wrong arrangement. in the photo is not supposed to wear high ISO, it is better to use low ISO with long Exposure. And the format of the image is also better using the RAW format for easy editing and searching, not the JPEG format.

Total Solar Eclipse August 21, 2017

thumbnail

Today (August 22, 2017) is a special day for the United States and its surrounding communities, there will be a very rare eclipse of the Sun Total, among the cities that passed are Oregon, Montana, Idaho, Wyoming, Nebraska, Iowa, Kansas, Missouri, Illionis, Kentucky, Tennesse, Georgia, North Carolina and South Carolina.

The partial eclipse phase will begin at 12:01 UTC-4. It reaches a maximum around 13:33 UTC-4 when the sun is 81% blocked by the moon. Partial eclipse ends at 15:00 UTC-4. For more details please visit NASA.

Total solar eclipse in the United States described the American Space Agency (NASA) through a video duration 04 minutes 25 seconds. The visualization contains details of eclipse location and explanation of why eclipses can occur. According to NASA, the eclipse will occur along 112 kilometers. In the video looks the line that seemed to divide the Land of Abang Sam from Oregon on the west coast of lau, to South Carolina on the northeast coast. See the following vidio:


One of the greatest features of a total solar eclipse happening in the United States today is to be the last eclipse for a long time, an eclipse of this type will happen 600 million years.

When the sky is dark you will feel the temperature down slightly. You may also be able to see and hear animals and insects going into their nightly cycles or nighttime routines. Remember that it can be a cloudy day but where you are, the sky will remain dark. More than a few days before, it would be difficult to know whether the sky might be cloudy or not.

Some things need to be a concern when the solar eclipse. Do not look directly at a partial solar eclipse. It can cause permanent damage to your eyes. Do not look through sunglasses, binoculars, or telescopes. You have to get special glasses known as "eclipse viewing glasses", if using binoculars or a telescope should also be equipped with special filters. Here's what you need to know in order to keep your eyes safe during an eclipse.

Do not forget also to perform the eclipse prayer !, please visit the following page for the Procedure of Performing The Eclipse Prayer.

Accurate Times

thumbnail
The Accurate Times application is a well-known application amongst the astronomers, this software is made by Mohammad Syawkat Audah. In this application there are several calculation programs, such as the program of Salat Time, Moon and Moon Setting program, Moon Phase, Hilal Visibility, Sun Ephemeris program, Hijriah-Masehi (Lunar-Sun) Calendar, Qibla Direction and also Solar and Moon position guidance program for telescope operation.

This application was originally a prayer time application adopted by the Jordanian Ministry of Religious Affairs for the early determination of the prayer time in Jordan, but at a later stage it developed to the point of calculating the conversion of the Hijriah-Mashi-Hijri date and the determination of the beginning of the continuing month on the visibility of the new moon .

The front view of the Accurate Times application

One of these in-app programs that reflects his thoughts is the Crescent Visibility or Visibility Hilal program the author has described in the previous chapter.

Crescent Visibility program display in the Accurate Times application

In this program provided several options for the determination of criteria:
- Waxing / Waning Crescent
This option is used to select the object we will look for visibility, whether young moon or old moon.
- Calculations
This option is used to select the basic reference of calculation, whether the calculation based on the geosentric point that will produce the essential moon, or from the surface of the earth (Toposentric) that will produce the hilal mar'i.
- Day of Calculations
This option is used to determine the state of visibility, at day of intent, 1 day or 2 days after.
- Time of Calculations
This option is used to select the visibility reference time, at sunset, when the Moon is set, or when the Best time, which is one of Mohammad Odeh's formulas also that the author has described in the previous discussion.

Map of Hilal Accurate Times Visibility

The above picture is the moon visibility map of the Beginning Moon of Shawwal 1438 in the Accurate Times application with youthful hilal, topocentric hilal, hilal on the day of ijtimak and hilal at best time.

Visit this link to download it. Download

Partial Lunar Eclipse August 2017

thumbnail
World is enlivened with a total solar eclipse that will occur in the United States on 21 August 2017. It's in America, but in Indonesia there are other events that are not less interesting that partial lunar eclipse. The astronomical event will occur 7-8 August 2017.

Partial lunar eclipses occur when the earth moves between the moon and the sun but not exactly straight in a line. When a partial eclipse occurs, a small part of the moon's surface is covered by the darkest part of the earth's core shadow or the so-called umbra. The remainder of the moon's surface is covered by the outer shadow of the earth or the so-called penumbra.

Launch Time and Date, partial lunar eclipses will occur when two astronomical events occur simultaneously. The event will occur when the moon is in full or full moon. When the earth moves between the moon and the sun but not exactly straight in one line occurs simultaneously.

However, not every full-moon partial eclipse can happen. This happens because the moon moves around the earth with a slope of orbit about 5 degrees to the Earth's orbit and the sun (ecliptic). Because of the moon's orbital tilt, not every new moon phase and full moon, the moon is exactly parallel to the earth and the sun.

Eclipses can only happen near the node point. The natural phenomenon occurs when a full moon occurs near a node, and a solar eclipse occurs when a new moon occurs near a node.

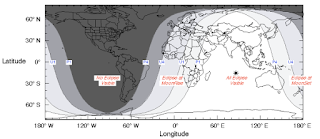
Information of Partial Lunar Eclipse August 2017
Source: eclipse.gsfc.nasa.gov/LEplot/LEplot2001/LE2017Aug07P.pdf

The partial lunar eclipse from 7-8 August 2017 will take place at 22:50 UTC+7 on August 7, 2017 (shown above with P1) as the Moon begins to enter the Earth's penumbral shadow. Then, a small portion of the Moon's face begins to enter the Earth umbra shadow from 00:22 UTC+7 (U1) to 02:18 UTC+7 (U4), its own peak will occur at 01:20 pm (Greatest), ie August 8, 2017.

The lunar eclipse will then end entirely when the Moon leaves the Earth penumbra shadow at 3:50 UTC+7 (P4). That way, the duration of this lunar eclipse reaches 1 hour 55 minutes with the maximum percentage of the peak of the eclipse is 24% disk tergerhanai Moon.

This partial moon eclipse event is quite safe to see with the naked eye with no tools like a binoculars or a telescope. Unlike solar eclipses that require special filtered glasses to protect our eyes from the dangers of the Sun's glare.

This partial lunar eclipse is included in the Saros 119 series and is the 62nd eclipse of a total of 83 eclipses in the series. In this case, the next Saros 119 or 63rd eclipse of the series will occur in about 18 years, precisely on 20 August 2035, which unfortunately is not visible from most parts of Indonesia.

But for partial partial eclipse 7-8 August 2017, Indonesia became one of the best locations to observe it. For those of you who happen to be out of Indonesia during a partial lunar eclipse later, do not worry, this eclipse can also be seen in most of Africa, most of Europe, all of Asia, Australia and Oceania countries.

Information of Partial Lunar Eclipse August 2017
Source: eclipse.gsfc.nasa.gov/LEplot/LEplot2001/LE2017Aug07P.pdf